
How I Create Professional Social Media Content With Just My iPhone
In my last blog post, I went over some tips for bullet journaling and floral illustration. Today, we’re looking at the one question I get asked the most - how do I shoot and edit all my social media content using just my phone? If you want to create fun, engaging, and professional content to build an online community but not spend a fortune on camera equipment, then keep reading.

This post will cover everything you need to know in order to get started on creating amazing photos + videos - including setting up and recording videos on your phone, what equipment and apps I use, and how I add royalty-free music to my videos. You may not necessarily need all the tools and products I mention, but these are just some things I use on a regular basis to create all of my digital content.
I’ve also just added a supplies section to the menu on my website, so you can easily find my recommendations for mural supplies, pens and pencils for hand-lettering, how to decide which iPad to buy, and more.
Note: Some of the links in this post are affiliate, and if you go through them to make a purchase, I might earn a small amount of revenue. Whether or not you decide to buy something is completely up to you. :)
Using My Phone To Shoot Videos And Photos
I’ll often get asked what camera I use to create social media content, and my answer is always the same - I don’t! At least, not in the sense of a traditional DSLR camera. I currently use my iPhone 8 for everything from shooting quick TikToks, longer timelapses for Instagram, and now as a second shooter for my Youtube channel. Total shocker, perhaps, but iPhones continue to set camera standards in the smartphone world and are a great option for creating content.
I find that I’ve been able to use my iPhone for all of my video and photo needs for the past 4 years, and only recently purchased an additional camera strictly for Youtube. Until then, however, I hadn’t felt the need to upgrade to a dedicated camera, not only because of careful budgeting but also because the iPhone is massively capable. I believe in getting the most out of all the tools I use, and doing what you can with what you have. In fact, before I actually upgraded to the iPhone 8, I used my iPhone 6 for everything. I didn’t even have a reliable laptop until last year, so I’m used to and actually prefer editing all of my footage directly on my iPhone. So if you’ve been holding yourself back because you don’t have professional equipment - think again.
But just having an iPhone is not going to turn you into a great content creator. You also need to train your eye in relation to photo composition, video editing, and more. Which brings us to one of my favorite features on the iPhone: the camera grid (and why it matters).
What is The Rule of Thirds?
The Rule of Thirds is probably the best-known composition rule in photography. It is often one of the first things you learn in a photography course because using it almost immediately leads to a more interesting visual. A quick summary of the rule of thirds is as follows: “...An image should be imagined as divided into nine equal parts by two equally spaced horizontal lines and two equally spaced vertical lines, and that important compositional elements should be placed along these lines or their intersections.” Source: Wikipedia

This is where the grid feature on your phone’s camera comes in! By dividing your image horizontally (↔) and vertically (↕) into 3 parts each, you can easily visualize those important intersection points and align your subject(s) accordingly for better composition and an immediately more visually interesting photo.
Now, this doesn't necessarily mean you need to apply this rule to everything you shoot - it’s just a great reference point for when you’re first starting out with taking videos or photos on your iPhone.
And here’s a quick pro tip: don’t shoot just using the square mode in your camera. Take regular photos and just crop them a little bit later, or take both regular and square photos if you want both. You can now upload a 4:5 ratio photo to Instagram instead of just a 1:1 ratio photo. Which not only allows for more interesting compositions, but takes up more screen real estate on IG and tends to have a bigger impact on your audience.
How to enable the camera grid on your iPhone
To activate the grid on newer versions of the iPhone and iOS, here’s what you can do:
Head to the Settings app on your device
Scroll to Photos & Camera to find the camera settings
Within the "Camera" Settings set the switch for "Grid" to ON
If you have an older iPhone, you can activate the grid using the camera app:
Launch the camera app
At the top, tap Options and hit Stripe Grid to "ON"
How To Choose A Tripod
An important part of your recording process is setting up your camera so it does all the hard work for you. A stable video/photo improves the quality drastically, and I like to set up my camera and tripod in advance so that I can arrange my scene to make sure it’s all in frame before I start filming.

Enter the clip-on tripod - I use this to shoot both photos and videos, and it’s very sturdy + budget friendly. It clips onto your desk so it’s perfect for filming while you work, and the gooseneck is flexible enough to get a variety of great angles.
I’ve even clipped it onto bookshelves and side tables to get that perfect overhead shot. In my experience, it’s one of the best multi-purpose options for a budget tripod.
For when a clip-on tripod just won’t do, this standing tripod comes to the rescue - and it’s still a super budget-friendly option if you’re not quite ready to shell out on pricier investments.

If, however, you are looking to invest in a tripod for the long term, I would highly recommend this Vanguard Alta tripod. It’s a more recent purchase of mine, but worth it in terms of quality, bells, and whistles.
It comes with multiple levels for height, actually levels to make sure your shot is perfectly aligned, and both a tilting arm + swiveling head. Not to mention it has attachments for both a phone and a traditional camera, and is great for setting up a traditional camera above your desk (a lot of Youtubers use this tripod).
Timer Vs. Remote
Alright, you’ve got your phone and tripod set up, but how do you start the video or take the photo? You definitely can use the time function on the iPhone, but if you’re in the photo itself you’ll have to keep running out of frame to start the timer.

This Bluetooth remote can save you a lot of time and headache with that, as well as allow for very creative photos. For only $8, you can click the button (which is connected via Bluetooth to your phone) and take photos or start video recording from a distance.
I use it to take photos when I want both hands in the photo (I’ll click it in my mouth very carefully - true story 😆) or when I want to start video recording and don’t want to bump the tripod and shake the camera.
How To Edit Photos And Videos On Your Phone
Editing social media content is absolutely doable on your iPhone, and I use free apps almost exclusively.
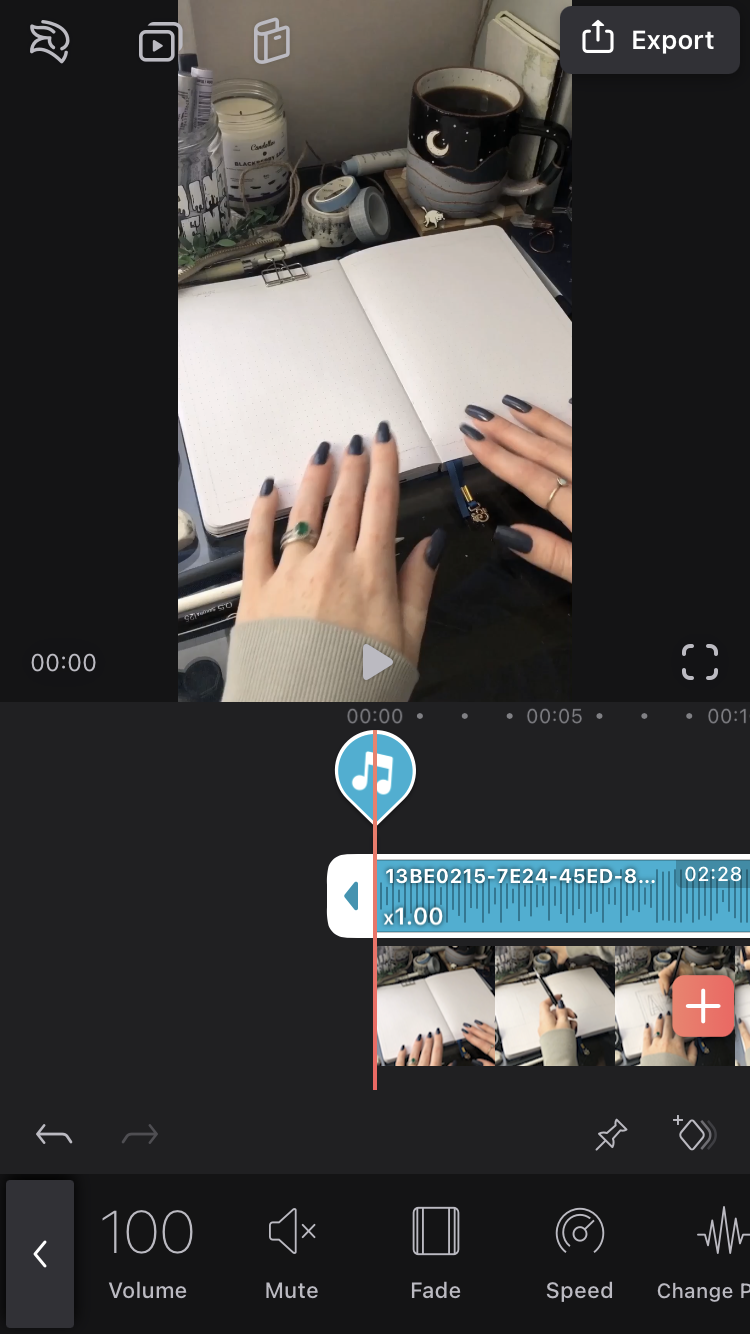
For video content, I use VideoLeap for almost all my editing requirements (with the exception of color grading) and so far it’s worked better that any other editing app I’ve used. It’s intuitive, feature-heavy, and the free version has enough options to make mobile editing a breeze. Apart from basics such as cropping, trimming, adding music, and color editing, the app also offers fun tools including special effects, filters, text, animations, green screen editing, layers, VoiceOver, and more. You can also pinch the video timeline to zoom in and edit frame by frame, or zoom out to edit large clips (see below).


To keep my photo and video content consistent, I love using VSCO. This free app offers all of their features except video editing, and if you want to add that in it’s only $20 a year (which I do personally choose to pay for). It’s easy to upload all of your content into VSCO and build your own filters + presets for consistent color temperature, contrast, and more. If you’re looking to maintain a cohesive Instagram grid or just have a signature style, the editing tools on VSCO can assist you with that curation.
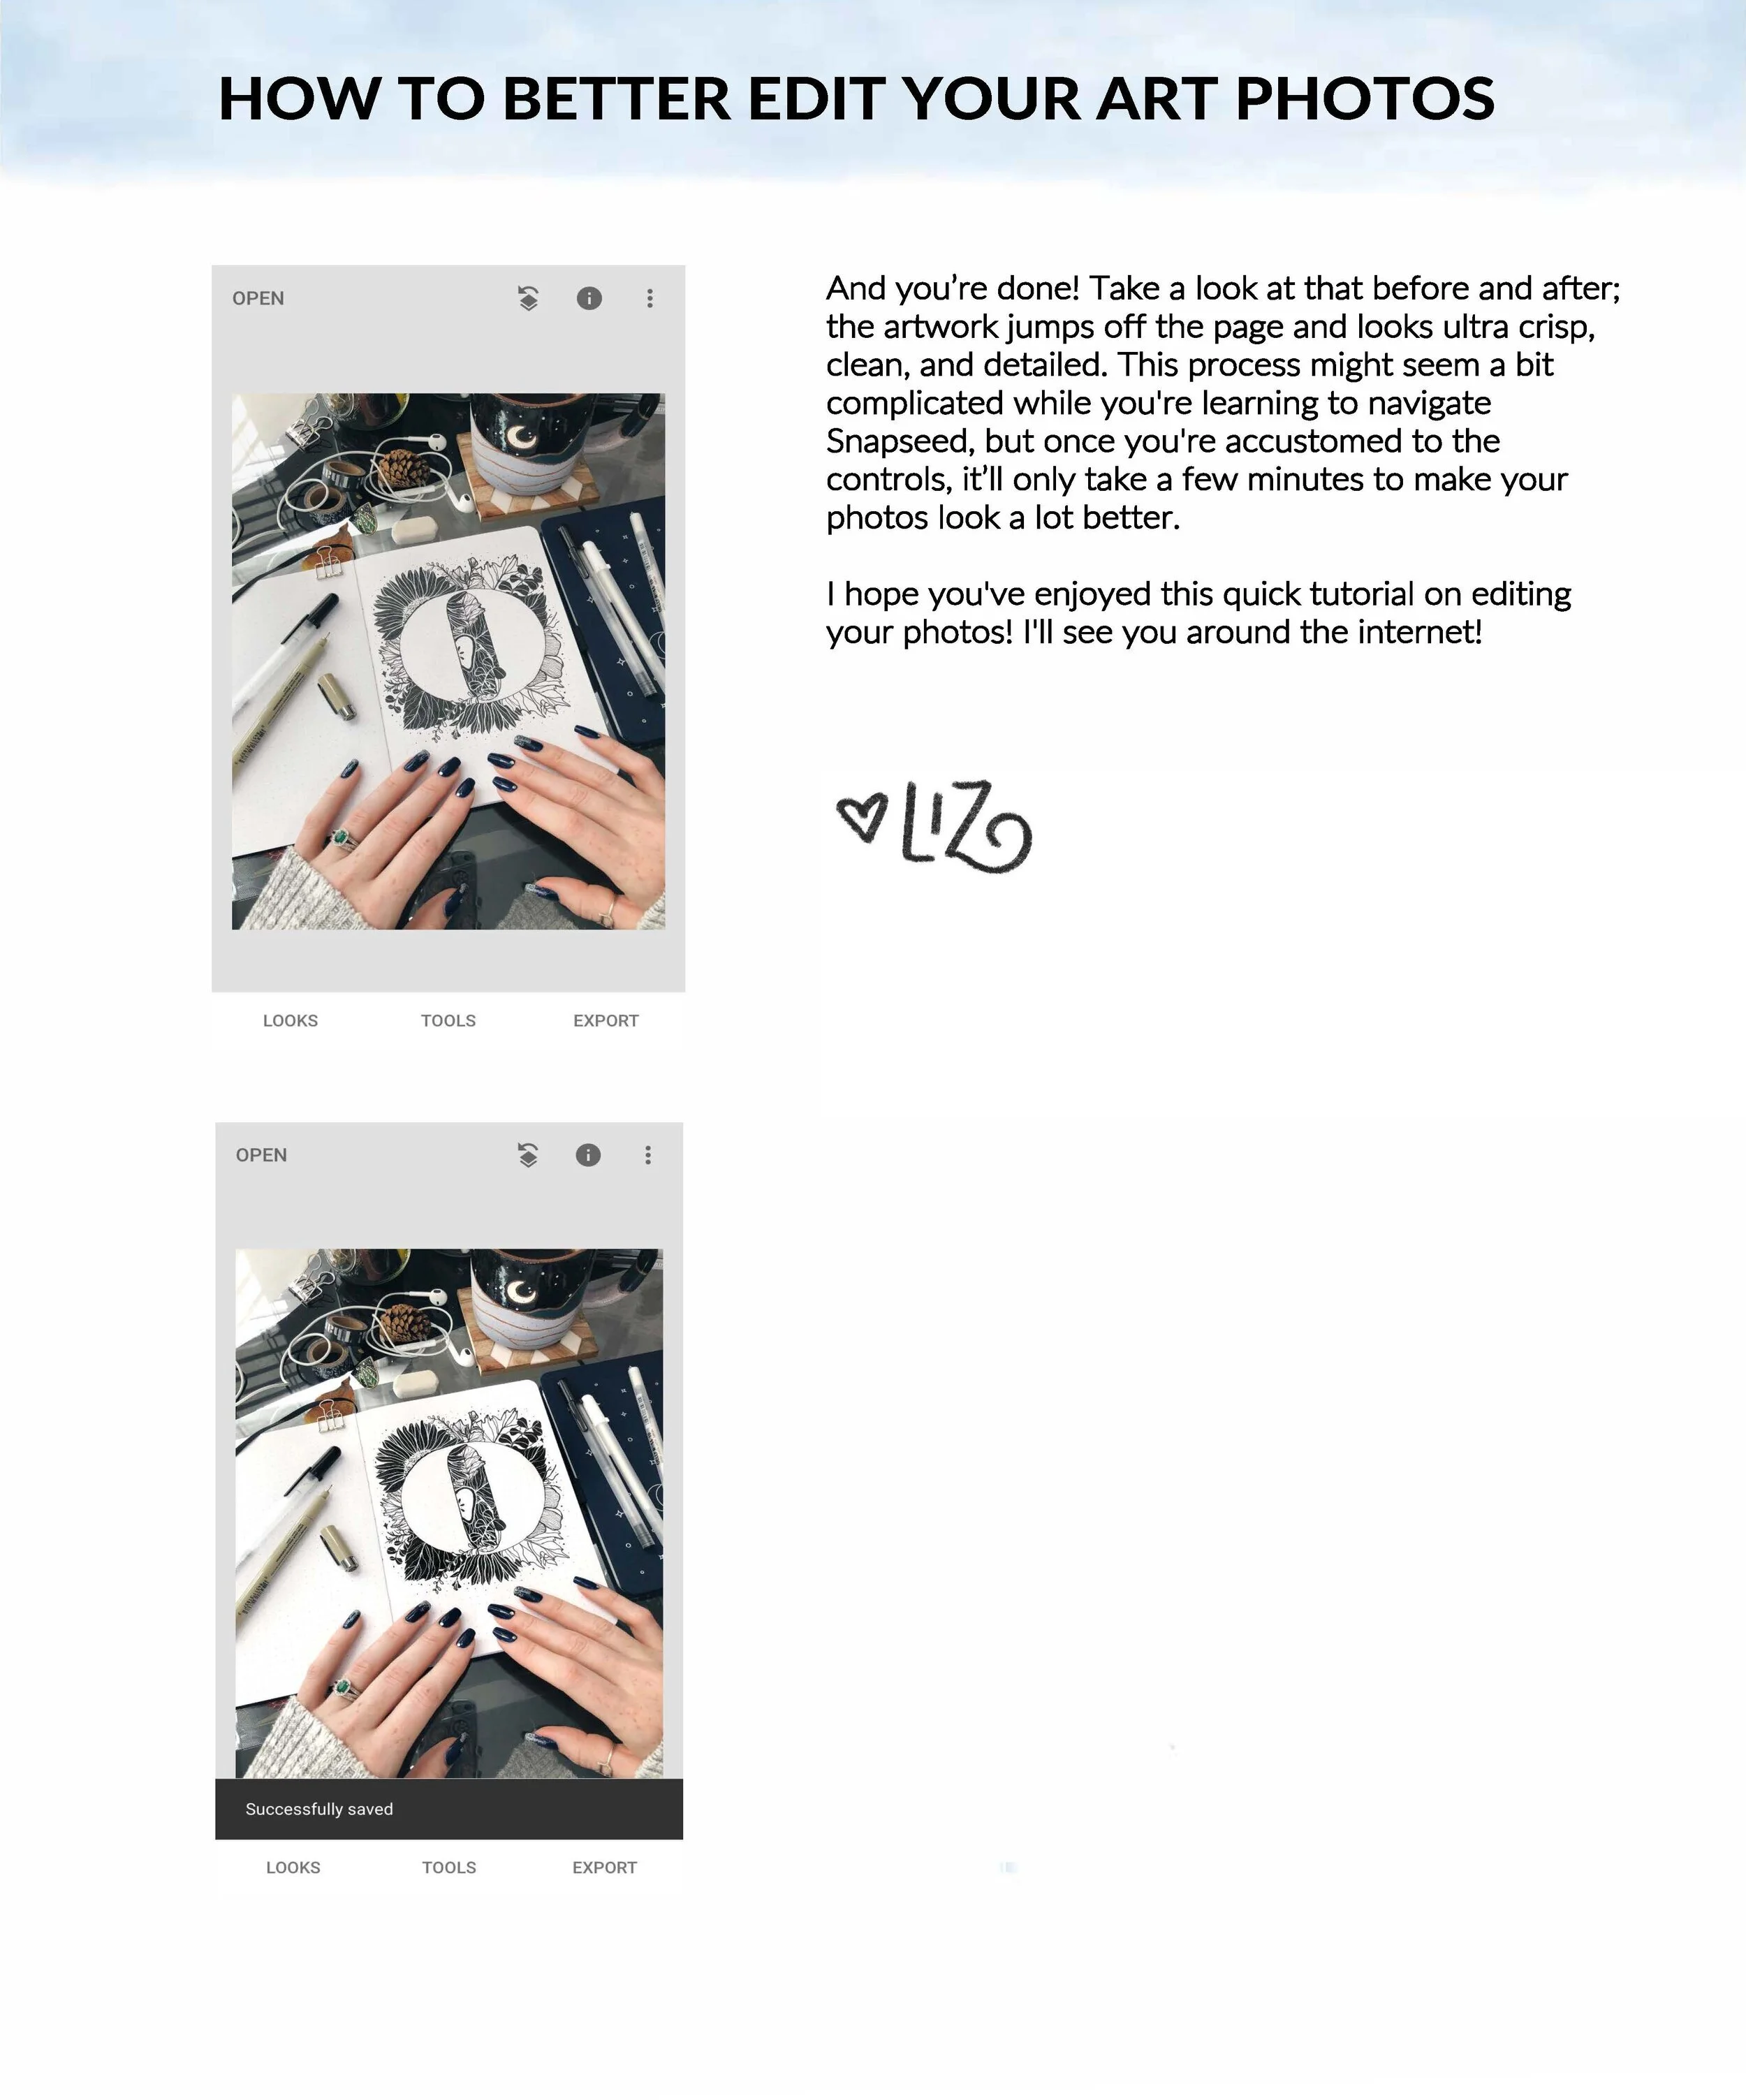
For more detailed photo editing, I like to use Snapseed! It’s another free app that offers a whole bunch of handy photo editing features, but my favorite thing to use it for is the Selection Tool, which allows you to highlight and edit particular parts of the photo and not just the overall look. If you want me to walk you through exactly how I use Snapseed to edit my photos, you can sign up here and get access to my email exclusive free resource library.
While you can use all these apps on your iPhone, I’ll occasionally use them on my iPad Pro since the larger screen makes it much easier for me to zoom into little details and get things just right.
Adding Music to Your Videos
The sounds that you add to your content can be very impactful. TikTok and Instagram now allow you to use copyrighted music for some content, but you can’t use it for a sponsored post or for any of Instagram’s long-form content options. For my own videos, I tend to use royalty-free music and turn to Epidemic Sound to find some non-boring-and-non-generic-sounding tracks. Make sure to read Epicemic Sound’s rules and policies about how you can use their music. It’s also very easy to download music from Epidemic Sound directly onto your phone and import it into Videoleap for seamless editing.
Epidemic Sound offers professionally composed music and high-quality sound effects with plans starting at $15 per month or $144 annually, but if you use my affiliate link you can access a free 30-day trial. They have multiple genres to choose from, you can search for music by mood or composer, and are one of my favorite resources for taking my content up a notch. Choosing a track that fits your brand’s vibe or that suits your video style adds a level of detail and professionalism that people will notice.
To easily add music to your video, here’s what you can do (make sure you have Videoleap open with your current project before you do this) :
Log into your account on Epidemicsound.com
Choose a track and select “download”. You can download the full mix or stems, which separates each instrument into it’s own file. I typically just get the full mix.
If you’re using Safari as your mobile browser, click the download arrow in the upper right-hand corner to view your music file.
Select the track and, at the bottom lefthand corner, click the share arrow.
Scroll the app list and select Videoleap. It will automatically import the track into the last video you had opened.

I really hope this has been useful in helping you create fun, engaging, professional content on your phone. Remember, you may not necessarily need all the supplies I’ve mentioned here - these are just what I use and what works well for me!
If you do find this post useful, please share it with your creative friends or send me an email with any questions or feedback. And if you’re really interested in upping your social media game, I’ll be talking about how I use, reuse, and repurpose my content in the next blog post. Because working smarter > working harder. See you then! :)
<3 Liz